GCC Appointment Slip: Complete Guide to Medical Booking & Download
GCC Appointment Slip
Introduction: Why One Small Slip Decides Your GCC Visa Progress
Every year, thousands of Indian working professionals apply for jobs in GCC countries.
Many face delays not because of skills or documents, but due to a missing or incorrect GCC appointment slip.
Common problems include:
- Slip not downloading after payment
- Wrong personal details on the slip
- Confusion between GAMCA and Gamca
- Medical center refusing entry without a valid slip
What Is a GCC Appointment Slip
A GCC appointment slip is a digitally generated document issued after a successful Gamca medical booking.
It confirms:
- Your medical appointment date
- Assigned medical centre
- Destination GCC country
- Passport-linked medical reference
Why the GCC Appointment lip Is Important
For Indian professionals, this slip acts as a gateway document.
Key benefits:
- Confirms booking with approved medical centres
- Prevents fraud and fake clinics
- Speeds up embassy medical verification
- Links your report directly with visa processing
Who Needs a GCC Appointment Slip
This applies to:
- First-time GCC job applicants
- Skilled workers and technicians
- Nurses, engineers, drivers, helpers
- Candidates applying for Saudi Arabia, UAE, Kuwait, Qatar, Oman, Bahrain
Step-by-Step GCC Medical Booking Process
Step 1: Access the Official Gamca Portal
- Open the authorised medical booking website
- Select your destination GCC country
Step 2: Enter Passport Details
- Passport number
- Full name as per passport
- Date of birth
Accuracy here is critical.
Step 3: Choose Medical City
- Select your preferred Indian city
- The system auto-assigns an approved medical centre
Step 4: Complete Online Payment
- Use debit card, credit card, or net banking
- Do not refresh or close the page
Step 5: Download GCC Appointment Slip
- Download the PDF immediately
- Save a digital copy and print one version
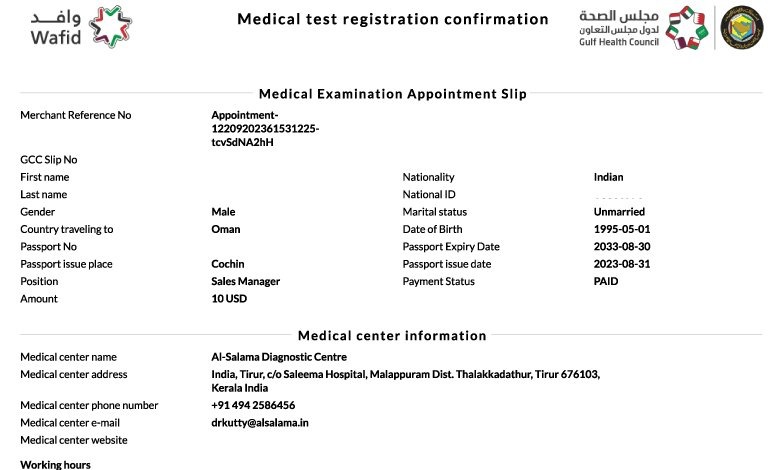
What Information Is Printed on the GCC Appointment Slip
Your slip includes:
- Applicant name
- Passport number
- Destination country
- Medical center name and address
- Appointment date
Common GCC Appointment Slip Issues and Solutions
Issue 1: Payment Done but Slip Not Generated
Solution
Wait for 30 to 60 minutes and log in again.
Issue 2: Wrong Name or Passport Number
Solution
Do not visit the center.
Cancel and rebook if allowed.
Issue 3: Slip Download Link Not Working
Solution
Try a different browser or device.
Documents Required Along With the Appointment Slip
Carry these on medical day:
- Original passport
- Printed appointment slip
- Passport-sized photographs
- Previous medical records if available
Medical Tests Conducted After Slip Verification
Once the slip is verified, the center conducts:
- Blood and urine tests
- Chest X ray
- Vision and blood pressure check
- Physical examination
Cancellation and Refund Rules for GCC Appointment Slip
Important points:
- Refund allowed only for system errors
- No refund after slip generation
- No refund after medical test completion
When You Should Download and Print the Slip
Best practice:
- Download immediately after booking
- Print at least one physical copy
- Keep a backup on your phone
Who Should Book GCC Medical Without Delay
Immediate booking is recommended for:
- Candidates with confirmed offer letters
- Applicants with embassy deadlines
- Professionals planning travel soon
Conclusion: One Slip, One Correct Process
A GCC appointment slip is not just a receipt.
It is your official approval to undergo GCC medical testing.
For Indian working professionals, understanding this document saves time, money, and repeat visits.
Follow the correct steps, verify details carefully, and your medical process will remain smooth.